ERE Expansion and Immediate Implant: A Premolar in One Session
In brief — A patient with significant bone loss and a food-trapping bridge was offered GBR plus 12 months of waiting. With ERE ridge expansion, the implant was placed in the same session as the expansion surgery, with simultaneous bone and soft tissue regeneration. After three months: definitive crown, new crowns on adjacent teeth, fully regenerated tissues. Multi-year follow-up: stable.
Sommario (IT) — Una paziente con un difetto osseo importante e un ponte che intrappolava cibo si è vista proporre GBR + 12 mesi di attesa. Con l’espansione crestale ERE, l’impianto è stato inserito nella stessa seduta della chirurgia espansiva, con rigenerazione simultanea di osso e gengiva. Dopo tre mesi: corona definitiva, corone nuove sugli adiacenti, tessuti completamente rigenerati. Follow-up a distanza di anni: stabile.
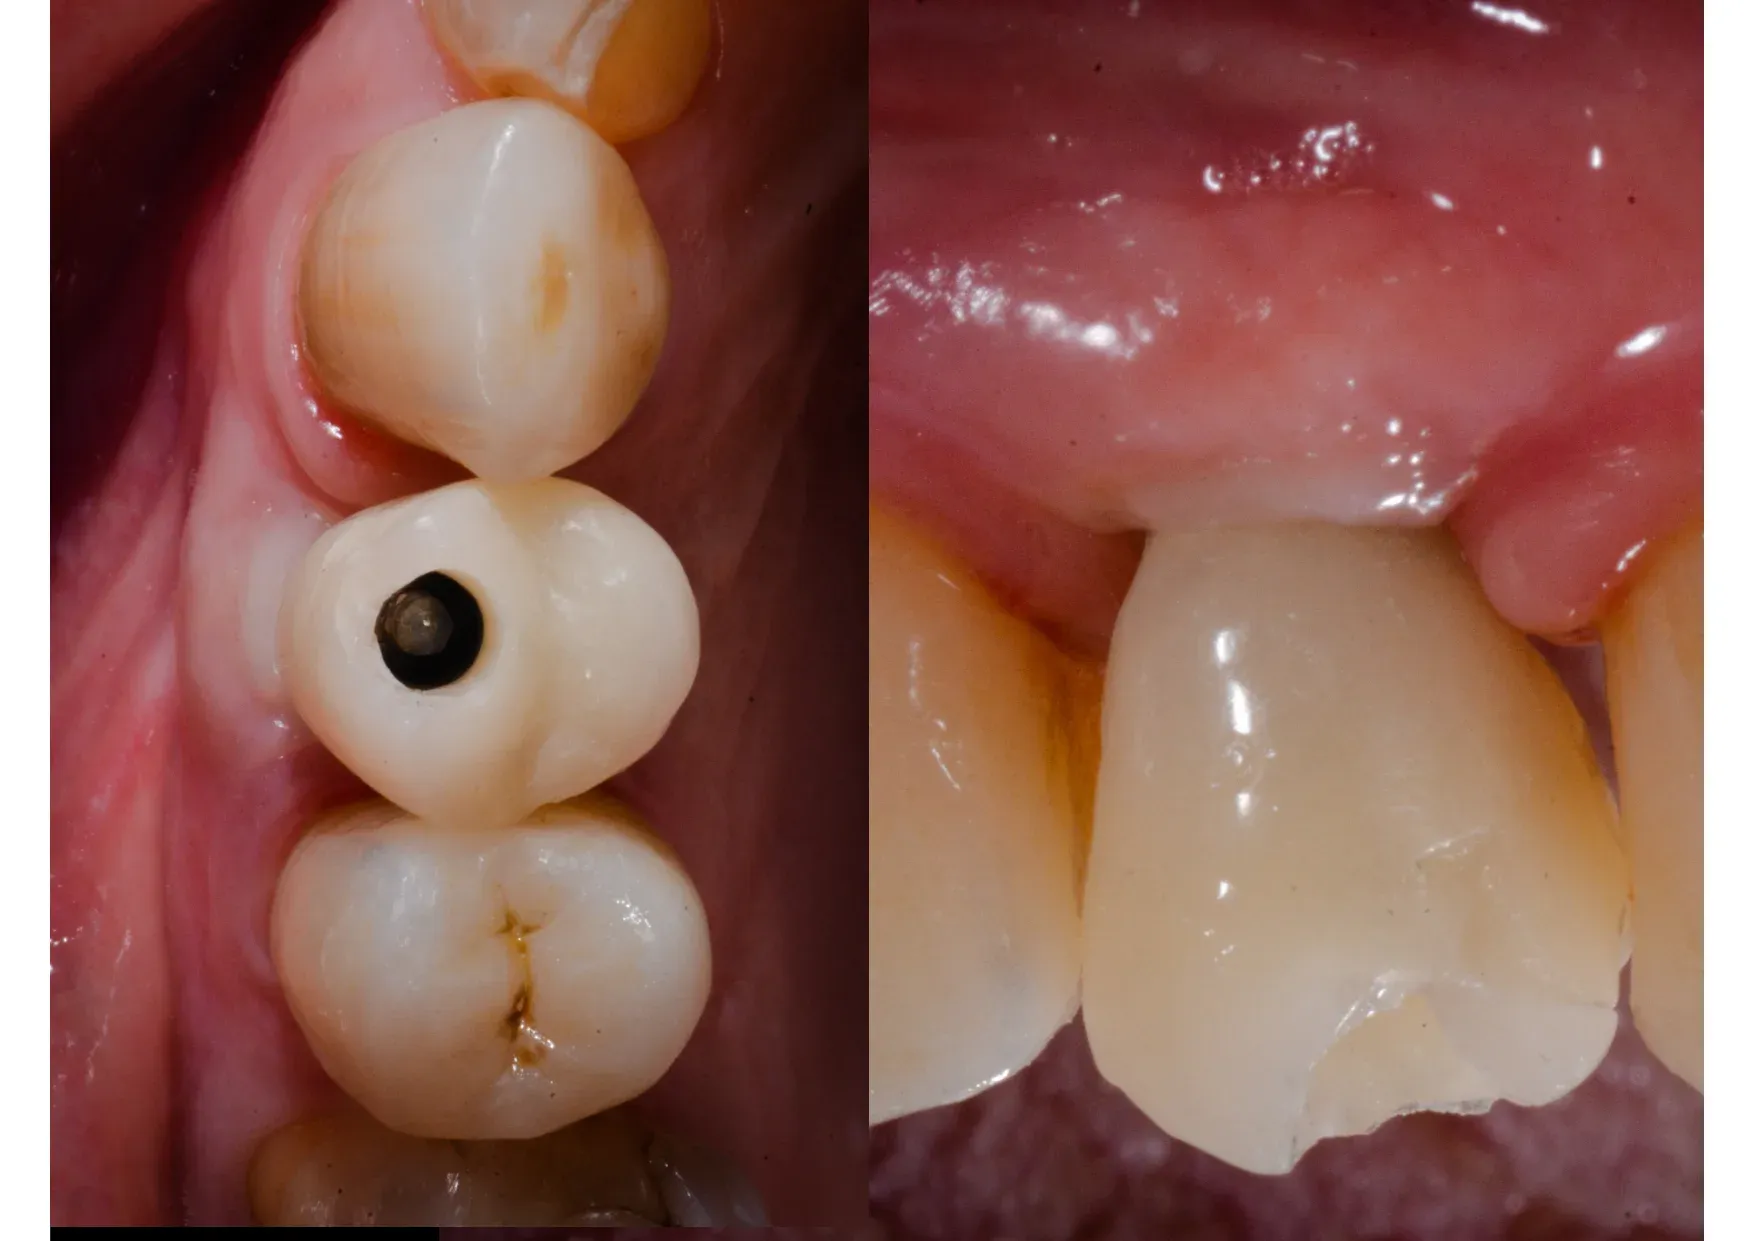
The problem
The patient had been wearing a bridge for years. Food trapped underneath it every single day. It happens when a bridge rests on an anatomical defect that was never corrected — the prosthesis doesn’t seal, food finds its way in, and frustration becomes routine. You can’t go through life with toothpicks permanently in hand.
She had already consulted another practice. Their proposal: guided bone regeneration, nine months of waiting for maturation, then the implant, then another three months for osseointegration. A full year of work. Two surgical procedures. Biomaterials and everything that comes with them.
I told her: I’ll place the implant now, regenerate bone and gingiva in a single session, and in three months you’ll have your tooth. In the meantime you’ll wear a provisional bridge so nothing shows. And you’ll already feel much, much better than before.
The starting point
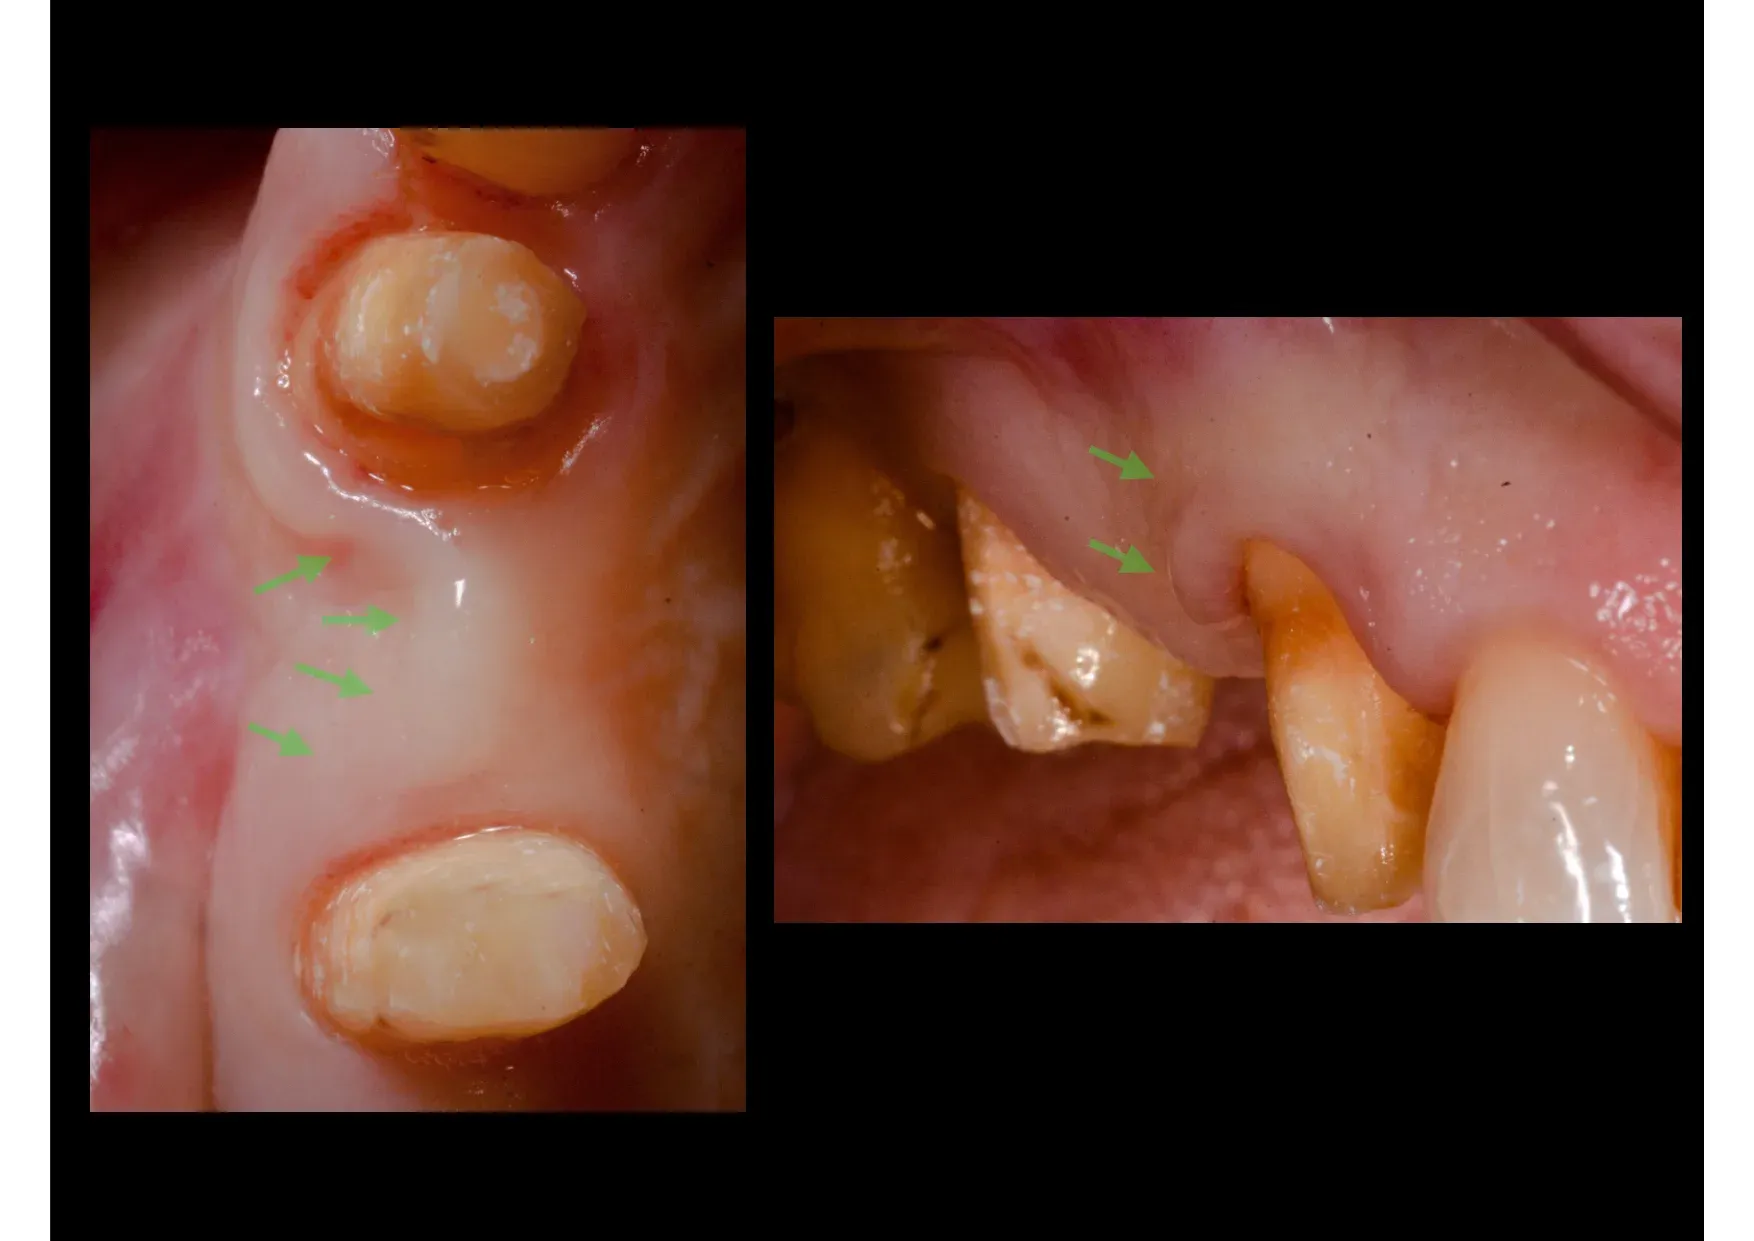
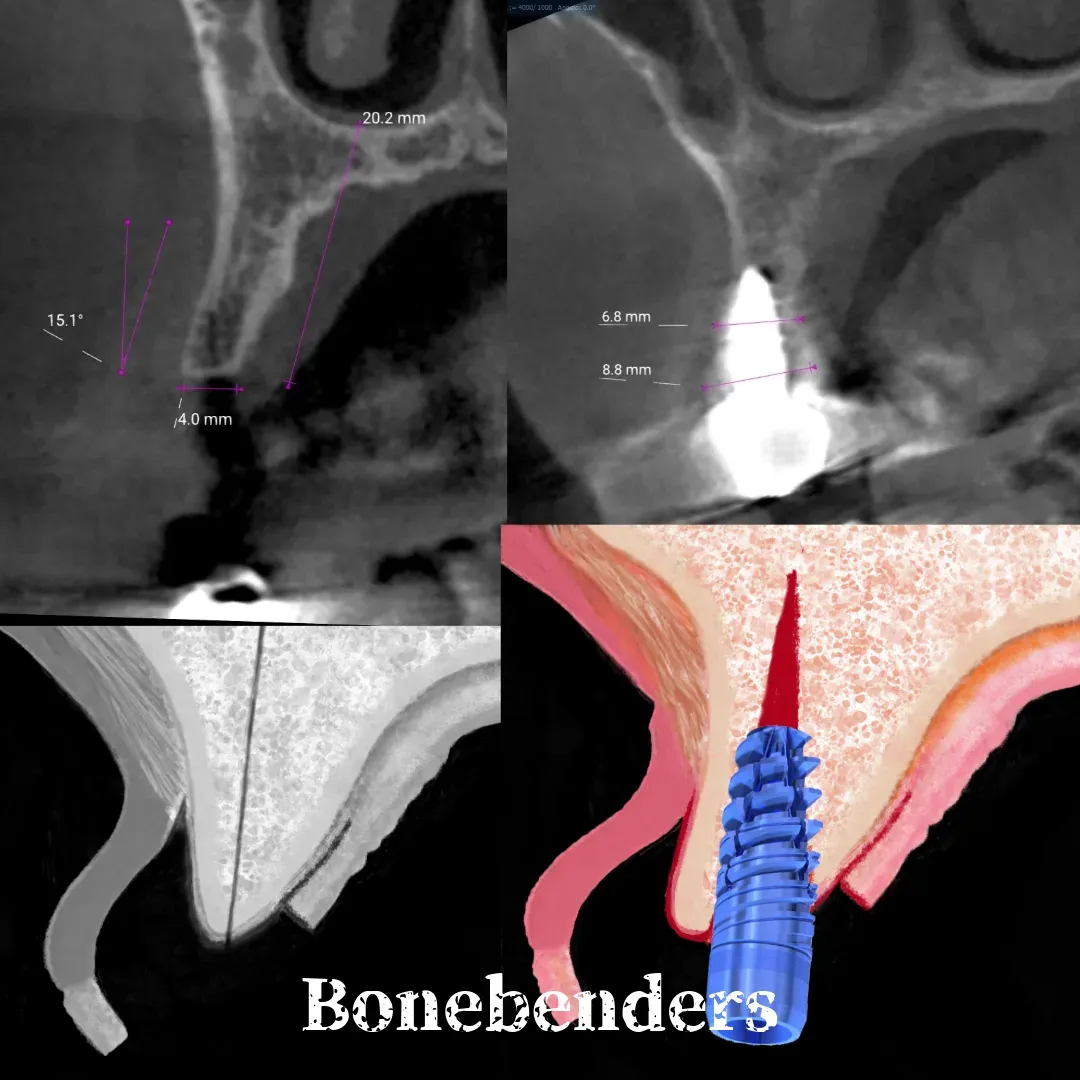
The bone defect was significant. The residual ridge was thin — just 4 mm on CBCT. A conventional implantologist would have said: bone is needed here, first regenerate, then implant. That’s the standard sequence. It’s not wrong. It’s long.
The surgery
The technique is ERE ridge expansion — Edentulous Ridge Expansion — codified in 1994 by Scipioni and Bruschi.¹ The principle: bone is not added, it is displaced. The buccal cortical plate is separated and moved laterally, creating space for the implant without resorting to bone grafts or biomaterials. The mucosa follows the contour of the underlying bone and regenerates as well. This is how you catch two birds with one stone in implantology.
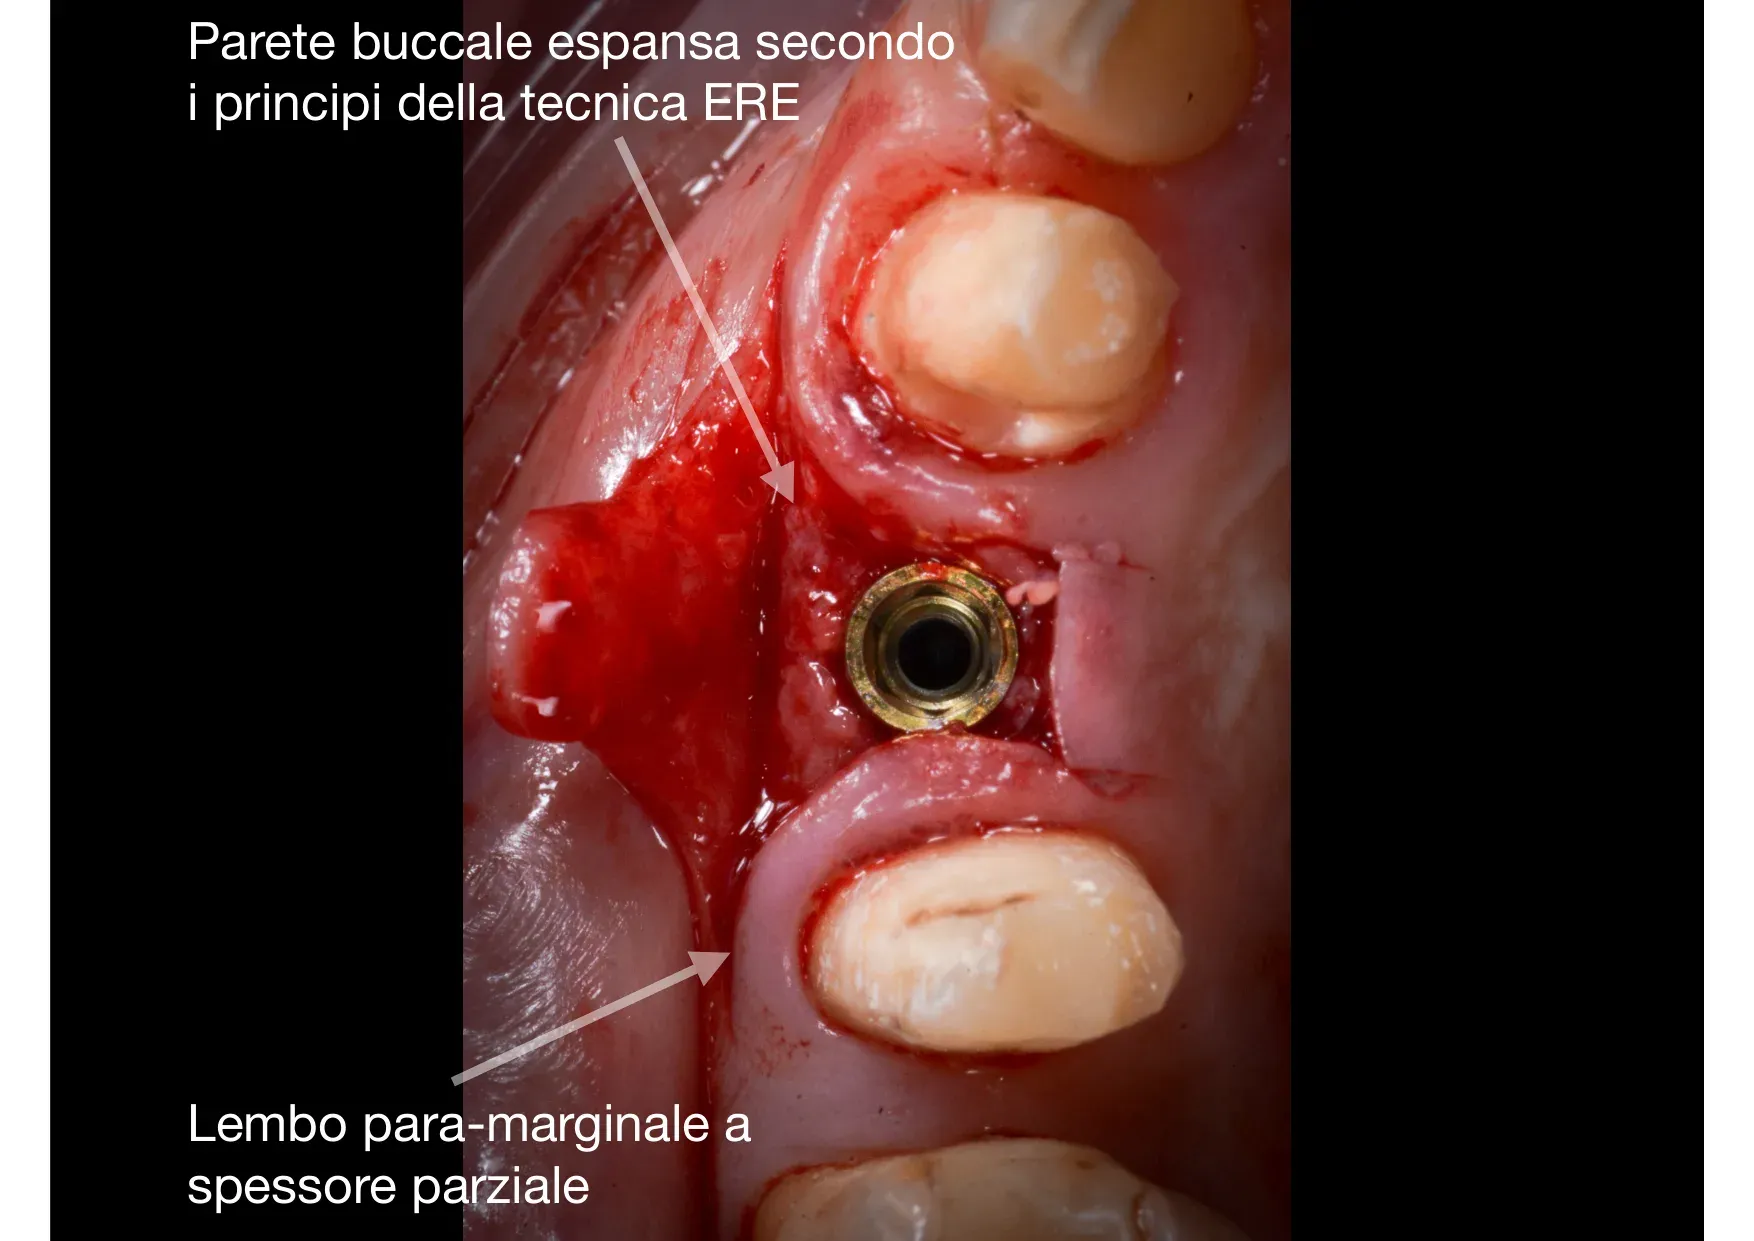
Two surgical details to note. First: the partial-thickness para-marginal flap. The gingival margin is not elevated — it is respected entirely, left attached to the periodontium. The buccal band of keratinised tissue remains intact, and this determines the quality of the final mucosal seal. Second: the expanded buccal wall. Not fractured, not removed — displaced. The bone remains vascularised, the periosteum intact. The blood clot filling the space between the walls is the master substrate of regeneration.
The tissue level implant was positioned as it should be — and I stress as it should be, because far too often it is placed too deep for its connection type. The smooth collar sits at crestal bone level, respecting the biological width. The difference between an implant that works for decades and one that loses marginal bone in the first two years is almost always about positioning.
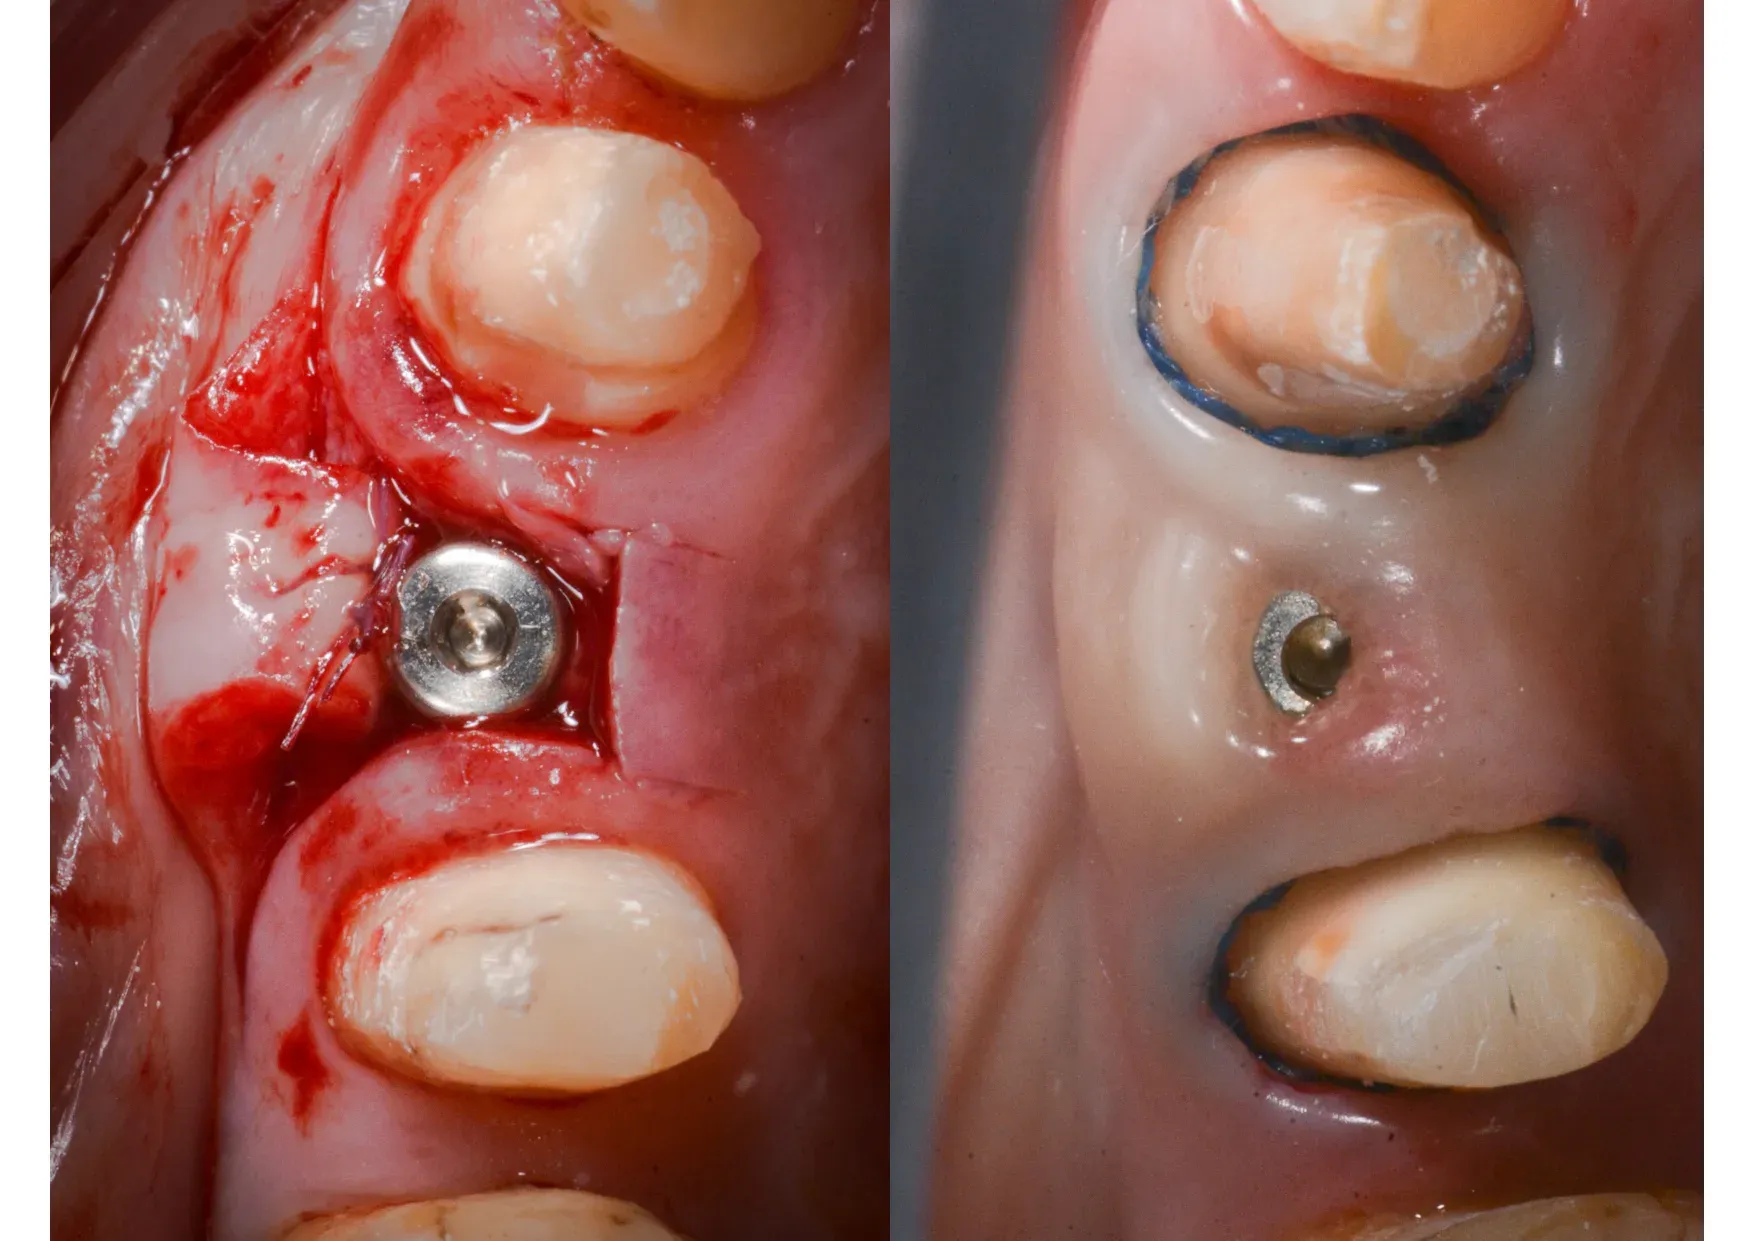
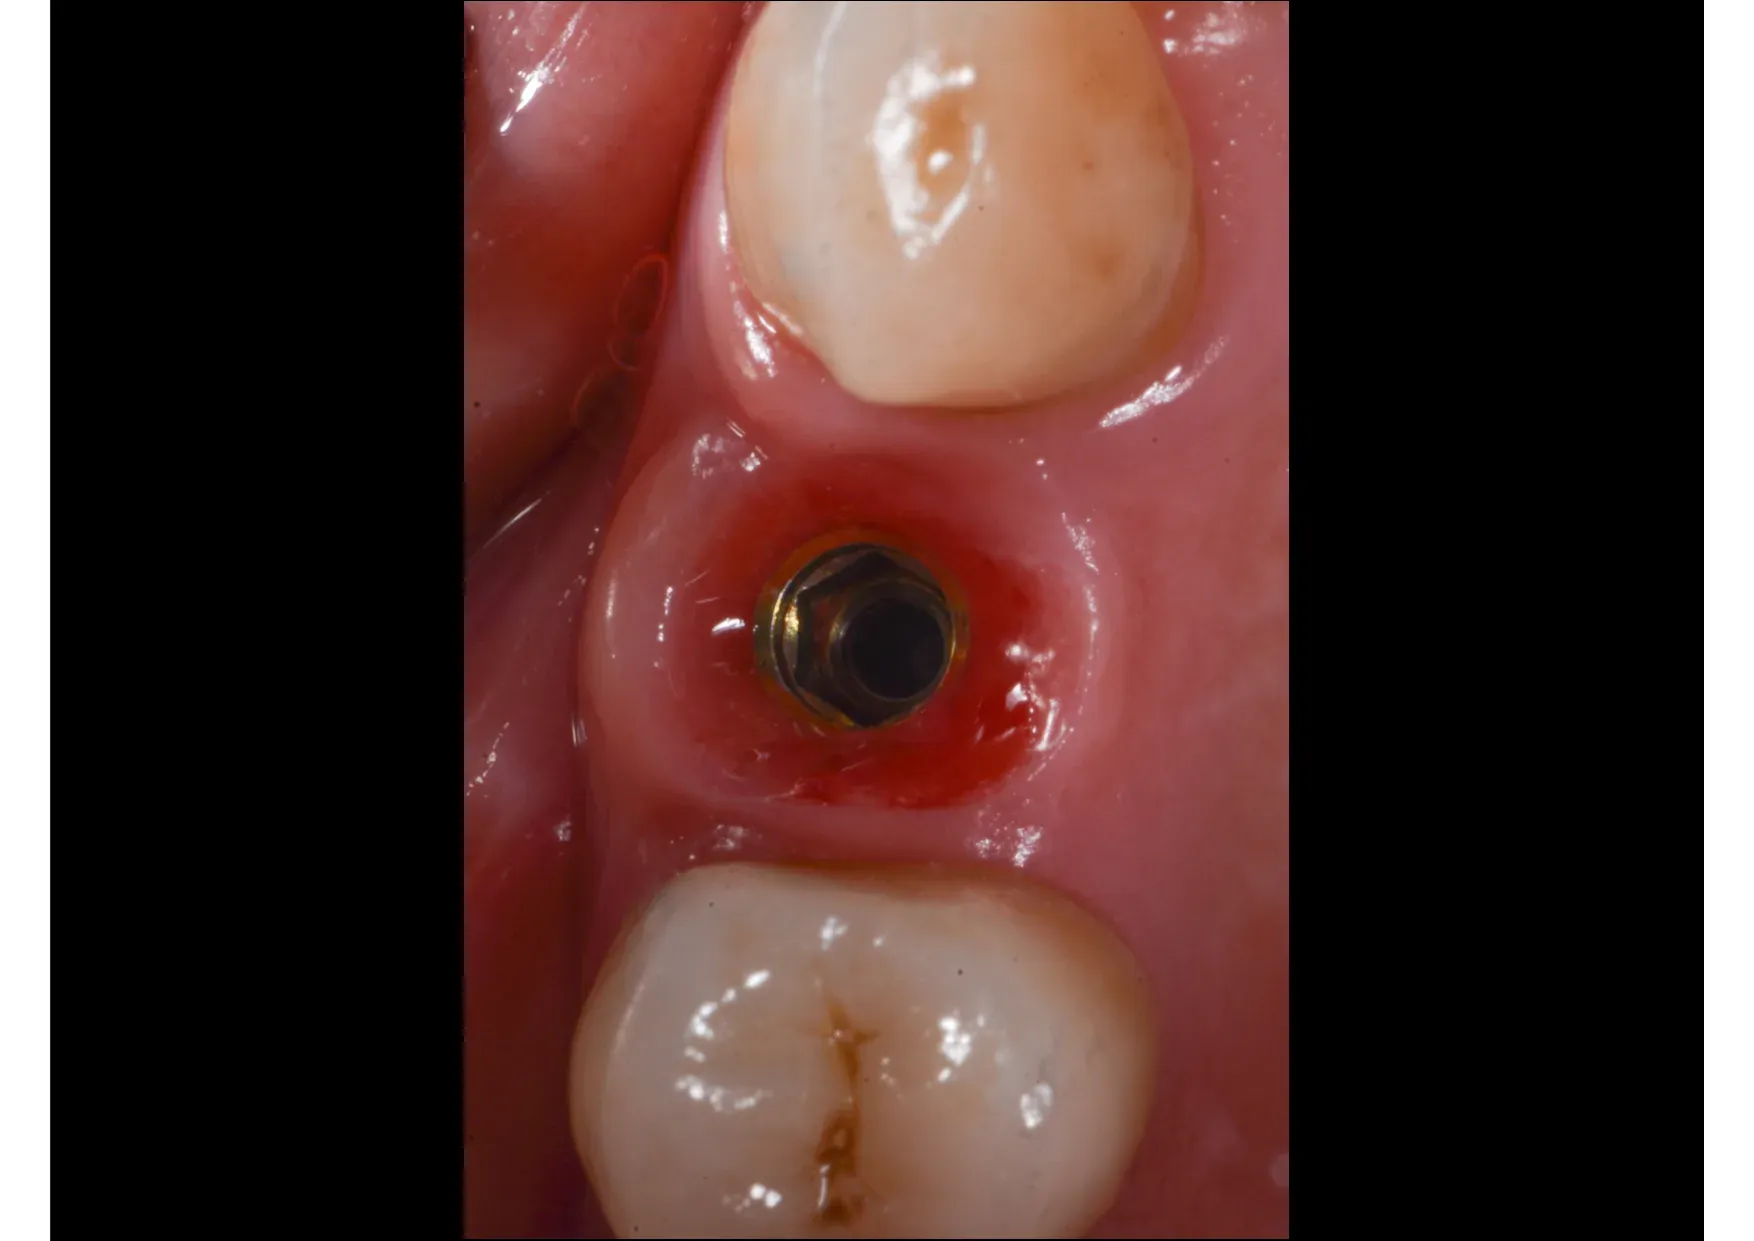
Three months later
Three months. Not twelve. The bone regenerated in the space created by the expansion — as documented histologically by Scipioni and Bruschi in 1999, where osteoblasts differentiate from mesenchymal cells present on the walls of the intraosseous surgical fissure.² The keratinised mucosa reformed by migration from the wound margins. The magic of secondary intention healing, once again.

The follow-up
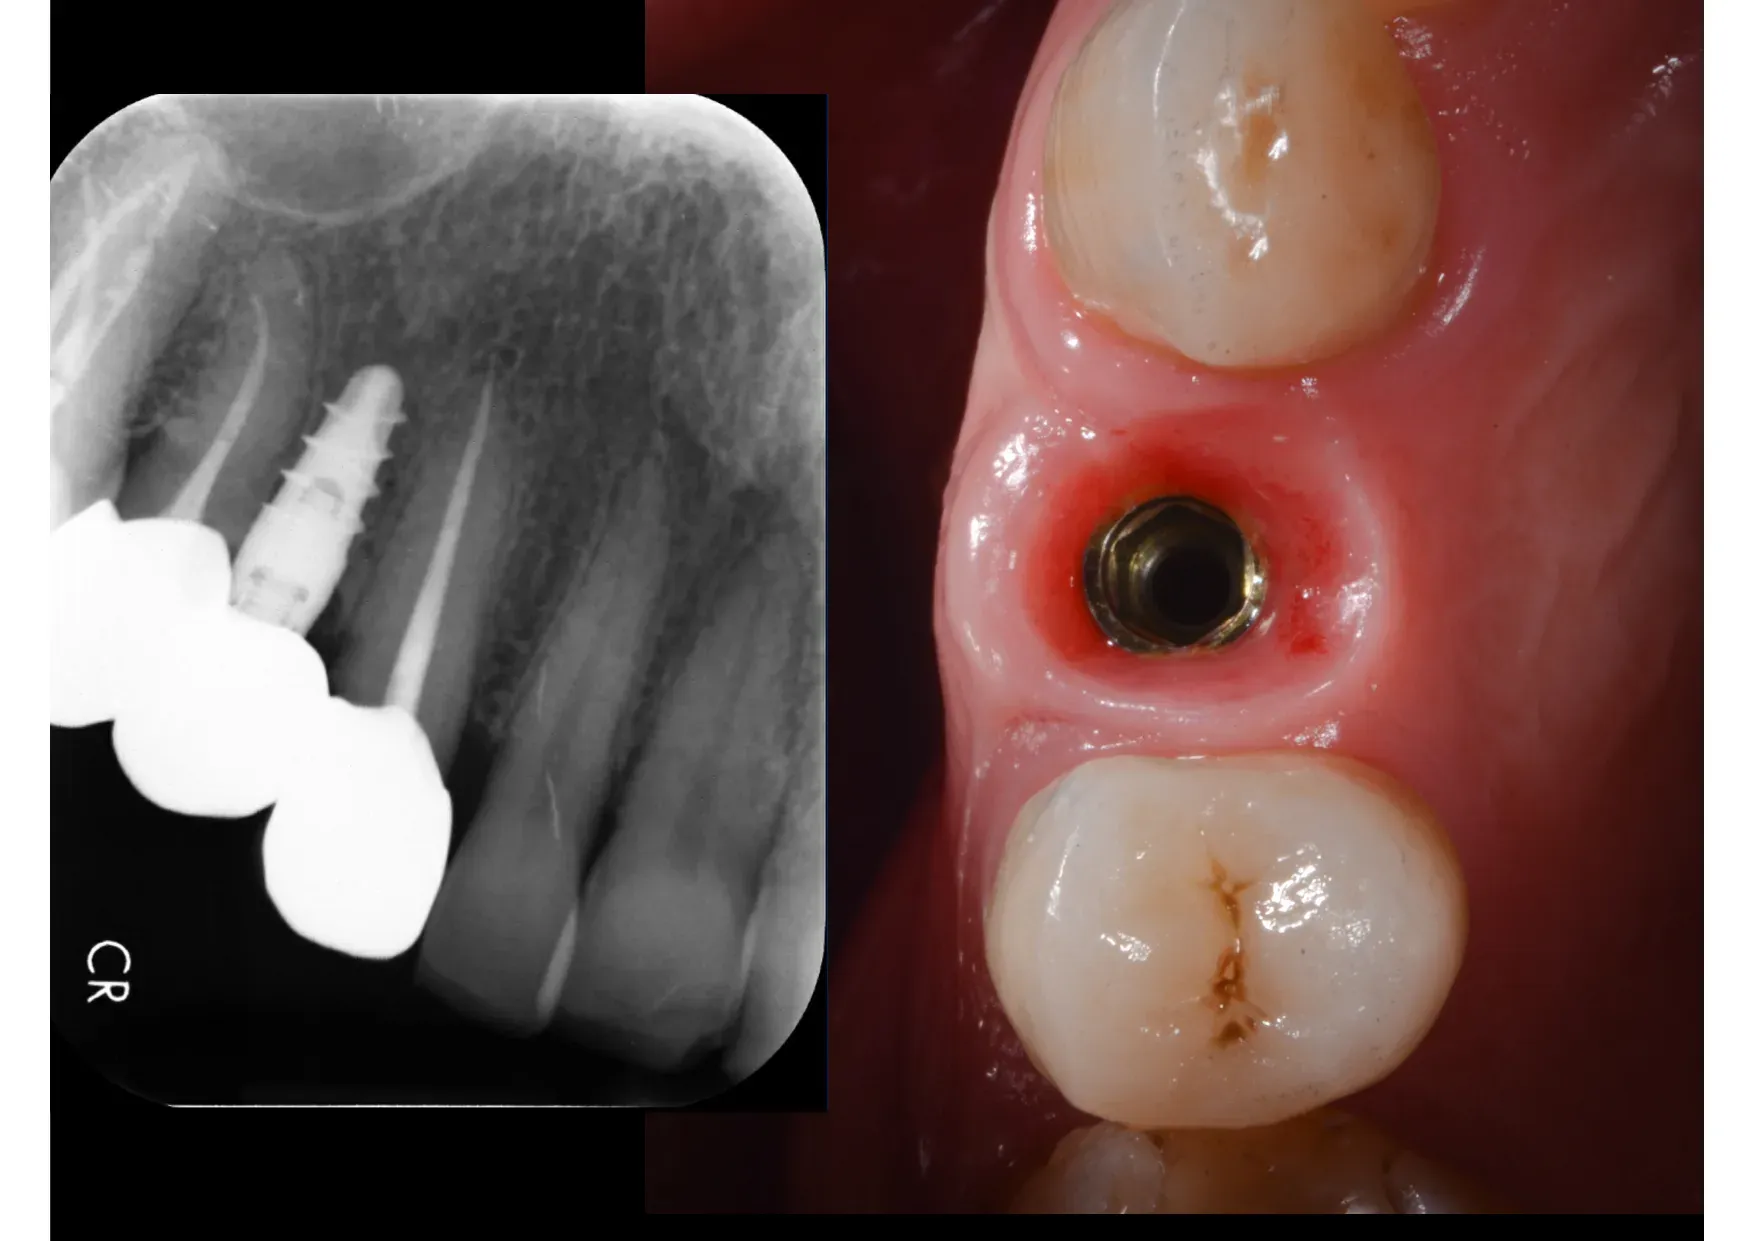
The patient has been using this implant for years. Crestal bone levels are stable.³ ⁴
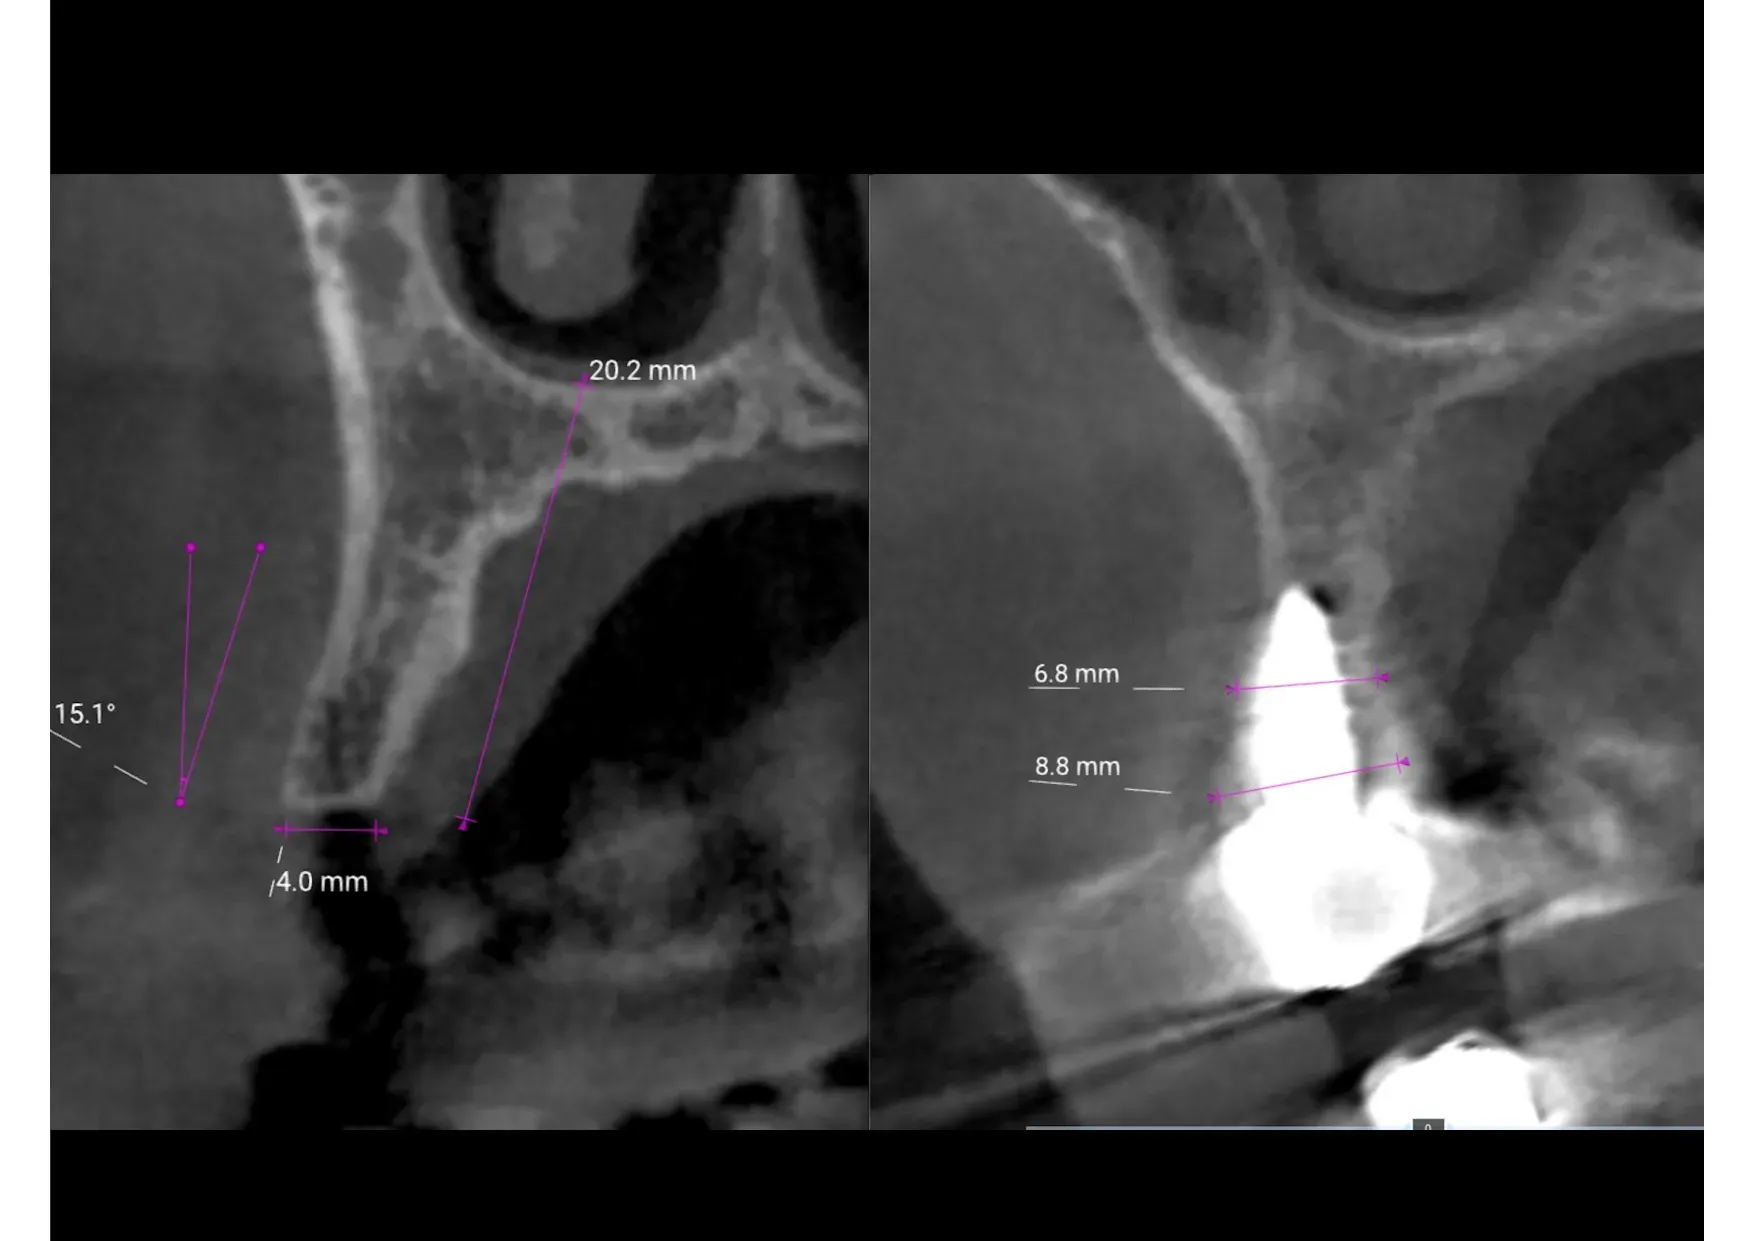
These are the numbers. From a 4 mm ridge to nearly 9 mm — no graft, no membrane, no second surgery. The bone was displaced, not added. And the result is verifiable: the CBCT doesn’t lie.
After this case, the patient replaced all her other missing teeth with implants. Trust is built like this: one result at a time.
What this case teaches
Three things.
The first is surgical. ERE ridge expansion allows you to condense into a single session what would otherwise require two surgeries and a year of waiting. It is not a shortcut, not a compromise — it is a different path, with long-term evidence documenting its reliability. Scipioni and Bruschi reported a 98.8% success rate on 329 implants at five years.¹ Crespi, Bruschi et al. confirmed 98.92% at two years with immediate loading.⁴ Bruschi et al. demonstrated bone stability beyond five years.³
The second is technical, regarding the flap. A partial-thickness para-marginal flap protects the buccal band of keratinised tissue (a tissue proper to the periodontium). It does not sacrifice it. This translates into a mucosal seal that is stable over time — and an aesthetic result that will not require corrective mucogingival surgery.
The third is clinical, regarding the tissue level implant. A correctly positioned tissue level implant — not too deep, not too shallow, with the smooth collar at crestal level — provides a natural mucosal seal and preserves bone. The problem is never the implant type. The problem is where you place it, and above all at what depth in relation to its prosthetic connection.
References
¹ Scipioni A, Bruschi GB, Calesini G. The edentulous ridge expansion technique: a five-year study. Int J Periodontics Restorative Dent. 1994;14(5):451-9. PubMed
² Scipioni A, Bruschi GB, Calesini G, Bruschi E, De Martino C. Bone regeneration in the edentulous ridge expansion technique: histologic and ultrastructural study of 20 clinical cases. Int J Periodontics Restorative Dent. 1999;19(3):269-77. PubMed
³ Bruschi GB, Capparé P, Bravi F, Grande N, Gherlone E, Gastaldi G, Crespi R. Radiographic Evaluation of Crestal Bone Level in Split-Crest and Immediate Implant Placement: Minimum 5-Year Follow-up. Int J Oral Maxillofac Implants. 2017;32(1):114-120. DOI
⁴ Crespi R, Bruschi GB, Gastaldi G, Capparé P, Gherlone EF. Immediate Loaded Implants in Split-Crest Procedure. Clin Implant Dent Relat Res. 2015;17 Suppl 2:e692-8. DOI
⁵ Demarosi F, Leghissa GC, Sardella A, Lodi G, Carrassi A. Localised maxillary ridge expansion with simultaneous implant placement: a case series. Br J Oral Maxillofac Surg. 2009;47(7):535-40. DOI
FAQ
- Can an implant be placed in the same session as ridge expansion?
- Yes. ERE ridge expansion is designed for simultaneous implant placement. The implant stabilises the expanded bone walls and regeneration occurs around the fixture, without the need for a second surgery.
- How much time is saved compared to traditional GBR?
- In this case the patient had her definitive tooth in three months. With the GBR protocol proposed elsewhere — regeneration, nine months of waiting, implant, another three months — she would have waited a full year.
- Is a tissue level implant suitable for this procedure?
- A correctly positioned tissue level implant — with the smooth collar at crestal level — maintains the biological width without resorption. The key is positioning, not the implant type.
References
Looking for a specialist?
Rigenerazione Ossea a Frosinone →Il Metodo Bonebenders: espansione osteo-mucosa senza innesti
Need a professional opinion?
Book an appointment at Dr. Bruschi's practice in Frosinone. First visit includes full diagnosis and personalised treatment plan.
Stai valutando un impianto dentale?
Ho scritto una guida in 8 capitoli che spiega tutto quello che un paziente dovrebbe sapere prima di sedersi in poltrona. Niente marketing — solo fatti, casi studio e una checklist per fare le domande giuste.
Scarica la guidaStay Updated
New articles on periodontology, implantology and oral surgery — delivered to your inbox.
Comments
Loading comments...
Leave a comment